Blessed Love in the Name of JAH RasTafari!
Like
the
Ethiopian Orthodox Church and Aaronic Priesthood, the Rastafari Priest
wears
fabric wrapped around his crown to signify his worship and service of
the Most
High JAH. The Bobo turban is however, much more fabric and made of
cotton
rather than white, fine linen. It is usually made by the leading empress
or an
appointed empress of the camp, and a brethren receives it from the
leading
priests of the tabernacle in a special ceremony, after a period of
culturing
and transformation. The time when a prophet or apostle or priest is
crowned or brought into altar service, is determined by the Leading
Priests of the community, who would have monitored his attendance to
service and gathering, progress in the Livity and Scripture, and
heartical attitudes for a period of months. The state of his household is also considered if he has one.
The crowning of the turban is indeed a baptism, just not with water. It comes at a time when the RasTa Man is totally read to "take up his cross" and walk in the path of JAH, Melchizedek, the King, the Priest. The Bobo prophet or priest must now walk with honour and live in cleanliness every day, never defiling his crown by sinning against the Laws of King Emmanuel, the Commandments or Priestly Order of Leviticus. That’s one of the reasons I raspect the Bobo Shanty, because those brethren make a serious commitment in covering their dreads, much like I and I Sistren make in covering up. Bobo Husband and wife perfectly reflect one another in their coverings, it is such a beautiful sight.
The crowning of the turban is indeed a baptism, just not with water. It comes at a time when the RasTa Man is totally read to "take up his cross" and walk in the path of JAH, Melchizedek, the King, the Priest. The Bobo prophet or priest must now walk with honour and live in cleanliness every day, never defiling his crown by sinning against the Laws of King Emmanuel, the Commandments or Priestly Order of Leviticus. That’s one of the reasons I raspect the Bobo Shanty, because those brethren make a serious commitment in covering their dreads, much like I and I Sistren make in covering up. Bobo Husband and wife perfectly reflect one another in their coverings, it is such a beautiful sight.
So with a slight
tip-toe around technicalities (which may land me in some fire later on too), I wouldn't make a turban for anyone who is not living righteously and is not conscious of the Nazirite and priestly code of the turban. But I thought for the strict Bobo Empresses out there who may not have a Taba or camp to go to, whose King-Man (who has been officially crowned already) may want turbans but can't access them regularly - this might be nice for the Sistren~ This method also serves for the Empresses too, in making a headwrap out of Afroprint!
Making a turban or headwrap is very easy – the hardest part is just having patience to go through all that
fabric, pressing and pinning, then sewing! Note that this turban tutorial is
for a brethren with a big crown or dreads past the buttocks. For those who have
shorter requirements, just cut the excess before starting using an old turban
as a guide. If you don’t know how long it should be, and the dreads are shorter
than waist length, try 1t o 1 1/4 yards until the fit comes. To determine the
size, the brethren can wrap and when he reaches the shape and neatness, he can stop
and the remaining fabric cut and hemmed. That would be the length to cut future
turbans at.
You will need: 2
yards of 45 inch fabric, scissors, lots of pins, iron, sewing machine and
corresponding needle to match fabric (just the regular needle should be fine),
yard stick, matching thread. The size of this turban will be 21 1/2 inches wide about, and around 4 yrds long.
Having a middle seam can leave a dark mark on the bredren's foreheads, so it is also a good idea to buy the total length needed and make two turbans out of it. Avoid middle seams!
Having a middle seam can leave a dark mark on the bredren's foreheads, so it is also a good idea to buy the total length needed and make two turbans out of it. Avoid middle seams!
Press out all the creases as much
as you can, out of the 2 yrds of fabric.
Fold the fabric in half, selvage
edges together, to form a long narrow rectangle.
Pin the edges together and press
down this fold well.
Cut the rectangle into two along
the side with the fold (opposite the pinned side).
Don’t move anything during this
next part. Pin the two rectangles at one of the short sides. Unpin the long
side. Selvage edges together still.
*if you are using the full length of the fabric, without the middle seam, skip this part and just press and hem the raw edges.
*if you are using the full length of the fabric, without the middle seam, skip this part and just press and hem the raw edges.
Along the short end, Zigzag the
edges and sew a 1/2 inch seam. Iron this seam out.
Starting at the top corner of the right short-rough cut end, start pressing in the first fold of the 1/2 inch hemline that will run along the non-selvedge side of the turban.
When you get to the left short end,
go back to the beginning and start the second 1/2 inch fold of the hem. Pin this time
around, not too many pins close together as the seam should hold from the iron
alone. Too many pins makes the sewing part tedious with pin removal. Always put
the pins in sideways or horizontal to the hem and not along the fold, so the
machine can run over them, and you don’t have to be unpinning and stopping all
the time. (As you can see I broke all my rules in the pictures below, but that’s
why I can tell you now to avoid giving yourself the extra hassle!)
(Also note in my pictures I made my
hem big – the smaller it can be the neater,
but really no one sees those edges anyway so no stress about that!)
When you have finished pressing and pinning,
take your “train” to the machine and start at the top right corner again, that
way you can just sew without having to stop. When you get to the corners, stop,
lift up the presser foot, turn the fabric, put back down the presser foot and
continue sewing.
Iron out all the seams with a hot
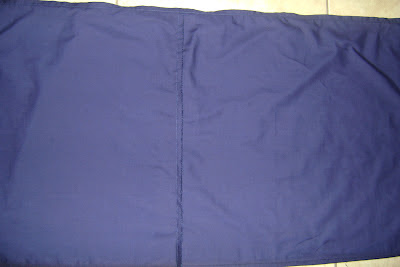
pressing! When it’s finished this is how it looks on the wrong side. The Seam
is a middle seam and the brethren uses that seam as the mark for the middle of
his forehead.
This is how the finished turban looks (Sizzla Kalonji):
Well Sistren, I hope this tutorial
helped the I! If you make a turban for your King, be sure to send I a picture
of his stepping out!
Blessed Love
Sis. Ila Addis


Hey,
ReplyDeletewhat kind of fabric did you use? I mean, is it strechy or not ?
Love,
L.
Greetings, most turbans are made of cotton or a non-stretch fabric
ReplyDelete